A 2023 study by Blancco Technology Group found that 42% of used drives sold on secondary markets still contained recoverable personal data — including tax documents, medical records, and login credentials. Simply dragging files to the recycle bin or even formatting your drive does not actually remove your data. If you're selling, donating, recycling, or decommissioning a computer, you need to properly wipe the drive first. This guide walks you through every method, for every operating system and drive type.
Key Takeaways:
- Formatting a drive does not erase data — a proper wipe overwrites every sector or issues a firmware-level sanitize command
- HDDs and SSDs require fundamentally different erasure methods due to how each stores data
- One overwrite pass is sufficient for modern hard drives, per current NIST 800-88 Rev. 2 guidance
- SSD overwriting alone cannot reach all data cells — firmware-based Secure Erase or Sanitize commands are required
- Free tools like DBAN and ShredOS handle HDDs effectively, but certified SSD erasure typically requires paid software
What Does "Wiping a Hard Drive" Actually Mean?
When you delete a file, your operating system removes the pointer that tells it where the file lives on the disk. The actual data remains physically written on the drive's platters or flash cells until something else overwrites that space. A quick format does the same thing at a larger scale — it rebuilds the file system table but leaves the underlying data intact. Anyone with basic recovery software can retrieve those files in minutes. Read our detailed explanation in why formatting doesn't erase data.
A proper wipe — also called data erasure, data sanitization, or secure erase — goes further. It either:
- Overwrites every addressable location on the drive with new data (zeros, ones, or random patterns), making the original data unrecoverable
- Issues a firmware-level command (Secure Erase or Sanitize) that tells the drive's controller to purge all stored data, including areas the operating system can't normally reach
- Destroys the encryption key on a self-encrypting drive (cryptographic erase), rendering all stored data permanently unreadable
The right method depends on your drive type, your operating system, and how sensitive your data is.
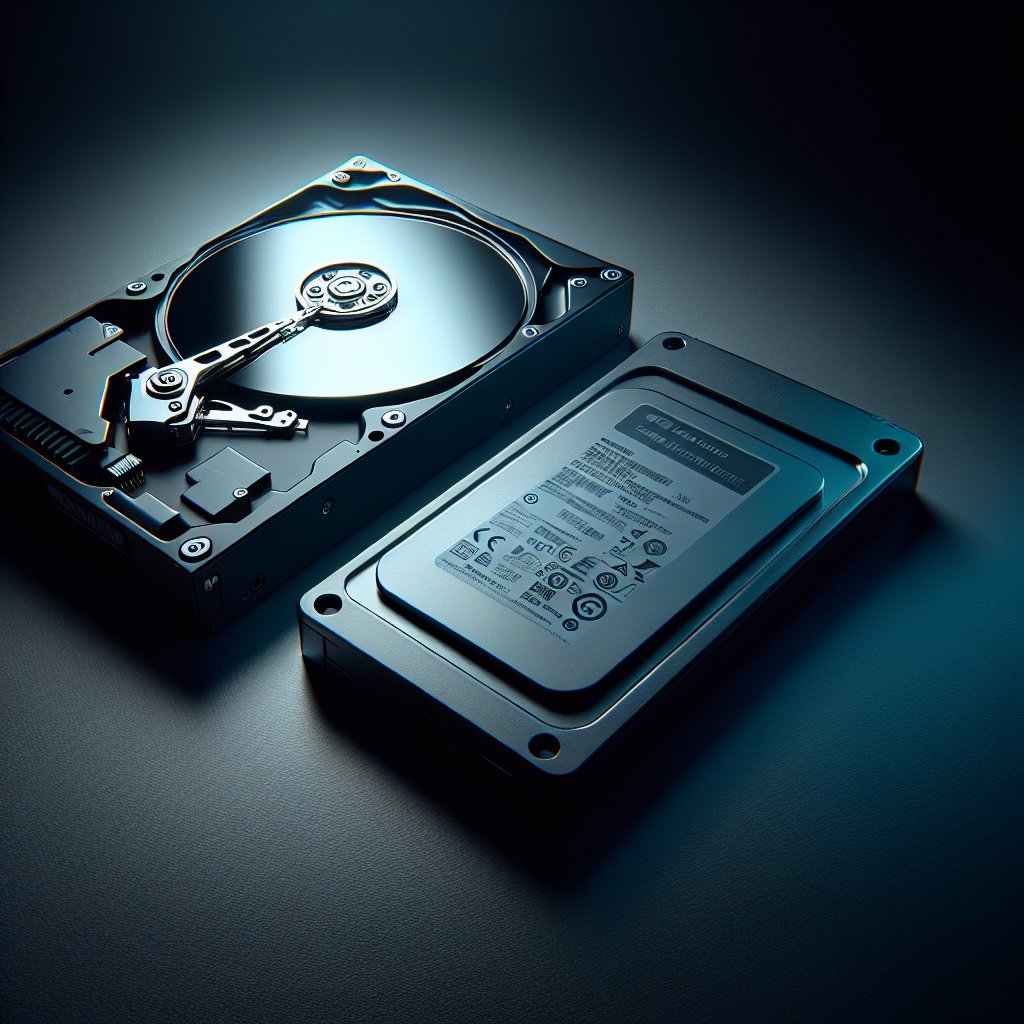
HDD vs. SSD: Why the Method Matters
This is the single most important distinction in data erasure, and getting it wrong can leave your data exposed. For a deeper look, see our article on SSD vs. HDD data erasure differences.
Traditional Hard Drives (HDDs)
HDDs store data magnetically on spinning metal platters. Each piece of data sits at a specific, predictable physical location. When you overwrite sector 1,000, the new data physically replaces the old data at sector 1,000. This makes HDD wiping straightforward: write new data to every sector, and the original data is gone.
Modern HDDs are dense enough that a single overwrite pass is sufficient to make data unrecoverable. This is the current recommendation from NIST Special Publication 800-88 Rev. 2 (published September 2025). The old idea that you need 3, 7, or even 35 passes comes from outdated research on older, lower-density drives. On a modern drive, one pass is enough. See our discussion of the myth of multi-pass wiping.
Solid-State Drives (SSDs)
SSDs store data in flash memory cells and use a component called the Flash Translation Layer (FTL) to manage where data is written. Unlike HDDs, SSDs don't write data to predictable physical locations. Several architectural features make overwriting unreliable:
- Wear leveling distributes writes across cells to extend drive life, meaning the FTL may redirect your overwrite to a completely different physical location than where the original data sits
- Over-provisioning reserves 7–28% of total capacity for performance and endurance — this space is invisible to the operating system and cannot be overwritten through normal means
- Garbage collection moves data around in the background, creating copies in locations you can't address
Because of these features, software-based overwriting on an SSD can miss significant amounts of data. The correct approach for SSDs is to use firmware-level commands — either ATA Secure Erase, NVMe Sanitize, or NVMe Format — that instruct the drive's own controller to purge all cells, including wear-leveled and over-provisioned areas.
For a complete walkthrough, see our dedicated guide to securely erasing an SSD.
Methods for Wiping a Hard Drive
Windows
Windows offers several built-in options, though they vary in thoroughness:
Reset This PC (Windows 10/11): The "Remove everything" option with "Clean the drive" selected performs a basic overwrite. Suitable for HDDs being passed to a trusted recipient, but not sufficient for SSDs or high-sensitivity scenarios. Full instructions in our Windows 11 wipe guide and Windows 10 wipe guide.
DiskPart (Command Prompt): The clean all command in DiskPart writes zeros to every sector of a disk. This works well for HDDs but has the same SSD limitations discussed above. To use it:
- Open Command Prompt as Administrator
- Type
diskpartand press Enter - Type
list diskto see all connected drives - Type
select disk X(replace X with the target disk number — triple-check this) - Type
clean all - Wait for the process to complete (this can take hours on large drives)
Cipher /w: The cipher /w:C:\ command overwrites free space on a drive. It's designed for cleaning up after file deletion, not for full-disk wiping, and should not be relied on as your only erasure method.
For wiping your primary system drive (the one Windows is installed on), you'll need to either use the Reset This PC method, boot from external media, or remove the drive and connect it to another computer. You cannot fully wipe a drive while the operating system running on it is active. See our guide on wiping a hard drive without an OS.
macOS
Disk Utility (Erase with Security Options): On Macs with traditional HDDs, Disk Utility offers a "Security Options" slider during erase that lets you choose between a single-pass and a three-pass overwrite. On Macs with SSDs (most modern Macs), Apple disables this option entirely because overwriting is unreliable on flash storage.
Terminal (diskutil secureErase): The command-line equivalent provides more control. For example, diskutil secureErase 1 /dev/diskX performs a single-pass zero-fill on the specified disk.
Apple Silicon / T2 Macs: Macs with Apple's T2 security chip or Apple Silicon (M1/M2/M3/M4) use hardware encryption by default. Erasing the volume through Disk Utility (or using "Erase All Content and Settings" in System Settings) destroys the encryption key, effectively performing a cryptographic erase. This is the recommended approach for these machines.
Full instructions are in our Mac hard drive wipe guide.
Linux
Linux provides powerful command-line tools for disk wiping:
dd: The classic Unix tool. sudo dd if=/dev/zero of=/dev/sdX bs=4M status=progress writes zeros to every sector of the target drive. Fast and effective for HDDs. Replace /dev/sdX with your actual drive identifier — use lsblk to confirm.
shred: GNU shred is designed specifically for data destruction. sudo shred -vfz -n 1 /dev/sdX performs one random-data pass followed by a zero pass. The -n 1 flag sets a single random pass, which is sufficient per NIST guidance.
nwipe: An interactive, ncurses-based tool forked from the original DBAN codebase. Offers multiple erasure methods and verification in a user-friendly terminal interface. Available in most Linux package managers.
hdparm / nvme-cli: For firmware-level SSD erasure on Linux, hdparm handles ATA Secure Erase commands for SATA SSDs, while nvme-cli handles NVMe Sanitize and Format commands for NVMe drives. These are the correct tools for SSD erasure on Linux.
Bootable USB Tools
When you need to wipe the drive your OS is installed on — or when you want a dedicated, single-purpose erasure environment — bootable tools are the answer. You create a bootable USB drive on another computer, boot the target machine from it, and wipe from outside the operating system.
DBAN (Darik's Boot and Nuke): The most well-known free disk-wiping tool. DBAN boots into a minimal Linux environment and lets you select drives to wipe. It works well for HDDs but does not support SSDs and cannot issue firmware-level commands. DBAN has not been updated since 2015 but remains functional for HDD erasure.
ShredOS: The actively-maintained spiritual successor to DBAN, built around nwipe. Supports modern hardware, UEFI boot, and provides the same multi-method erasure options. Like DBAN, it handles HDD overwriting but not SSD firmware commands. Free and open source.
Parted Magic: A paid ($15) bootable Linux environment that includes both nwipe for HDD overwriting and ATA/NVMe secure erase tools for SSDs. One of the few bootable options that handles both drive types properly.
Step-by-Step: Wiping a Hard Drive with DBAN
DBAN remains one of the most accessible methods for wiping a traditional HDD. Here's the complete process:
What You'll Need
- A USB flash drive (1 GB minimum)
- A second computer to create the bootable USB (or download in advance)
- DBAN ISO file (free download from dban.org)
- Rufus, Etcher, or another USB flashing tool
- 1–8 hours depending on drive size and method selected
Creating the Bootable USB
- Download the DBAN ISO file from dban.org
- Download and install Rufus (Windows) or Etcher (Windows/Mac/Linux)
- Insert your USB flash drive
- Open Rufus/Etcher and select the DBAN ISO
- Select your USB drive as the target (verify you're selecting the right drive)
- Click Start/Flash and wait for the process to complete
Booting and Wiping
- Insert the DBAN USB into the target computer
- Power on (or restart) the computer and enter the boot menu (typically F12, F2, or Del during startup — varies by manufacturer)
- Select the USB drive from the boot menu
- DBAN will load. At the boot prompt, press Enter to start in interactive mode
- Use the arrow keys to select the drive you want to wipe. Press Space to mark it
- Press M to choose the erasure method. For most cases, select "DoD Short" (3-pass) or "PRNG Stream" (1-pass random). Despite the DoD naming, one random pass is sufficient for modern drives
- Press F10 to begin the wipe
- Wait for the process to complete. DBAN will display "PASS" next to the drive when finished
Warning: DBAN will destroy all data on the selected drive. There is no undo. Disconnect any drives you want to keep before booting DBAN, or be extremely careful with drive selection.
Bottom Line: For traditional HDDs, a single-pass overwrite with any reputable tool — DBAN, ShredOS, or even DiskPart's clean all — is sufficient to make data unrecoverable. For SSDs, skip software overwriting entirely and use firmware-level Secure Erase or Sanitize commands, either through manufacturer tools or a program like BitRaser Drive Eraser that handles both drive types with certified results.
Data Erasure Standards: A Quick Overview
Several data erasure standards exist, each specifying how data should be destroyed to meet different security requirements. For the full breakdown, see our data erasure standards guide.
NIST 800-88 Rev. 2
The gold standard for data sanitization in 2026. Published by the National Institute of Standards and Technology, NIST SP 800-88 Rev. 2 (September 2025) defines three levels of media sanitization:
- Clear: Overwrites data using standard read/write commands. Protects against simple file recovery tools. One pass is sufficient.
- Purge: Uses firmware-level commands (Secure Erase, Sanitize, Cryptographic Erase) or degaussing. Protects against laboratory-level recovery attempts.
- Destroy: Physical destruction (shredding, incineration, disintegration). Used when media will not be reused.
NIST 800-88 is the most widely referenced standard in data sanitization policies and compliance frameworks worldwide.
DoD 5220.22-M
The U.S. Department of Defense standard specifying a 3-pass overwrite (write zeros, write ones, write random data, verify). While still widely referenced in marketing materials and software tools, the DoD itself no longer uses or recommends this standard for media sanitization. The Defense Counterintelligence and Security Agency (DCSA) now follows NIST 800-88 guidelines. Many organizations still reference DoD 5220.22-M in their policies out of habit, but it is effectively obsolete.
IEEE 2883-2022
A newer standard published by the Institute of Electrical and Electronics Engineers, specifically addressing the sanitization challenges of modern storage technologies including SSDs, NVMe drives, and storage arrays. IEEE 2883 provides device-specific sanitization procedures that account for wear leveling, over-provisioning, and other flash-specific issues that NIST 800-88 addresses at a higher level.
Recommended Tools
The right tool depends on your drive type, budget, and whether you need certification.
For HDDs (Free)
- DBAN: Free, bootable, proven track record. Best for one-off personal use. No SSD support, no certificates.
- ShredOS: Free, open source, actively maintained. Modern DBAN alternative with UEFI support.
- Built-in OS tools: DiskPart (Windows), Disk Utility (Mac), dd/shred (Linux) — no extra software needed.
For SSDs
- Manufacturer tools: Samsung Magician, Western Digital Dashboard, Kingston SSD Manager, Crucial Storage Executive, Intel Memory and Storage Tool. Free, but each only works with that manufacturer's drives.
- BitRaser Drive Eraser: Supports both HDDs and SSDs across all manufacturers. Issues firmware-level commands for SSDs and provides tamper-proof certificates of erasure. Pricing starts at $39 per use. Best choice when you need certified proof of erasure for compliance.
- Parted Magic: $15 one-time purchase. Includes both overwrite tools and ATA/NVMe secure erase. Good for IT professionals who wipe drives regularly.
For Enterprise / Compliance
- BitRaser Drive Eraser: Centralized management, detailed audit trails, certificates recognized by compliance auditors. Supports NIST 800-88, IEEE 2883, and other standards. Pricing scales for volume.
- EaseUS BitWiper: Budget-friendly option with basic certification. Supports common erasure standards and handles both HDDs and SSDs.
For a complete comparison with detailed scoring, see our best data erasure software roundup.
Common Mistakes (And How to Avoid Them)
Mistake 1: Thinking a Format Is the Same as a Wipe
A quick format takes seconds because it only rebuilds the file system index — your data remains on the drive. Even a full format in modern Windows (which does perform a surface scan) is not a verified data erasure method. Always use a dedicated wiping tool or sanitize command.
Mistake 2: Using HDD Overwrite Methods on SSDs
Software overwriting on SSDs leaves data behind in over-provisioned areas, wear-leveled blocks, and retired cells. If you ran DBAN on an SSD, your data is likely still partially recoverable. Use firmware-level Secure Erase or Sanitize commands instead.
Mistake 3: Wiping the Wrong Drive
This happens more often than people admit. Before starting any wipe operation, disconnect all drives you want to keep, or triple-check device identifiers. In DiskPart, verify the drive size and disk number. In DBAN, confirm the model number and capacity. Once a wipe starts, your data is gone.
Mistake 4: Skipping Verification
Wiping without verification means trusting that the process completed correctly without actually checking. Most professional tools include a verification pass that reads every sector after writing to confirm the overwrite succeeded. Enable it. If your tool doesn't offer verification, use a hex editor to spot-check random sectors after the wipe.
Mistake 5: Ignoring Hidden Areas
Host Protected Areas (HPA) and Device Configuration Overlay (DCO) can hide data in sections of a drive that normal tools don't touch. Professional erasure tools detect and clear these areas. Free tools like DBAN may not. If you're wiping drives that contained truly sensitive data, use a tool that explicitly addresses HPA/DCO.
Mistake 6: Assuming Factory Reset Equals Secure Erasure
Resetting a phone, tablet, or laptop to factory settings often does not securely erase the underlying storage. On Android devices, factory reset historically left recoverable data, though modern devices with encryption do better. On Windows PCs, "Reset This PC" without the "Clean the drive" option is essentially a quick format. Learn the difference in our Windows reset vs. secure erase comparison.
When to Wipe vs. When to Physically Destroy
Not every situation calls for data erasure. Sometimes physical destruction is the right call:
| Scenario | Recommendation |
|---|---|
| Selling or donating a working computer | Wipe — the drive will be reused |
| Returning a leased device | Wipe with certificate — you need proof |
| Recycling old hardware | Wipe first, then recycle — see our recycling guide |
| Decommissioning drives with classified data | Destroy — shred or degauss per organizational policy |
| Drive has failed / won't power on | Destroy — you can't wipe what you can't write to. See our dead hard drive guide |
| Drive with bad sectors | Destroy — bad sectors can't be overwritten and may retain data |
If you're preparing a computer for sale, our guide to wiping before selling covers the full process including what to back up, how to wipe, and how to reinstall the OS.
All Guides in This Series
This pillar guide covers the essentials, but we have dedicated guides for every specific scenario:
By Operating System:
- How to Wipe a Hard Drive in Windows 11
- How to Wipe a Hard Drive in Windows 10
- How to Wipe a Hard Drive on Mac
- How to Wipe a Hard Drive Without an OS
- How to Wipe a Hard Drive from Command Prompt
By Drive Type:
- How to Secure Erase an SSD
- NVMe Secure Erase Guide
- How to Wipe a USB Flash Drive
- How to Wipe an External Hard Drive
By Manufacturer:
- Samsung Magician Secure Erase
- Western Digital SSD Secure Erase
- Crucial Storage Executive Secure Erase
- Kingston SSD Manager Secure Erase
- Intel SSD Secure Erase
By Situation:
- How to Wipe a Hard Drive Before Selling
- How to Wipe a Hard Drive Before Recycling
- How to Wipe a Dead Hard Drive
- How to Wipe a Hard Drive for Free
Frequently Asked Questions
How long does it take to wipe a hard drive?
It depends on the drive size, type, and method. A single-pass overwrite on a 1 TB HDD typically takes 2–4 hours. An SSD Secure Erase command completes in seconds to minutes because it operates at the firmware level rather than writing to every sector individually. Larger drives and multi-pass methods take proportionally longer.
Does wiping a hard drive remove the operating system?
Yes. A full disk wipe erases everything on the drive, including the operating system, applications, and all user data. You will need to reinstall your OS afterward if you plan to keep using the drive. Back up anything you need before wiping.
Can data be recovered after a hard drive wipe?
After a proper single-pass overwrite on an HDD, data recovery is not feasible with any commercially available tools or techniques. For SSDs, a successful firmware-level Secure Erase or Sanitize command renders data unrecoverable. The key word is "proper" — incomplete wipes, quick formats, or software overwrites on SSDs may leave recoverable data.
Is one pass enough to wipe a hard drive?
Yes, for modern HDDs. NIST Special Publication 800-88 Rev. 2 confirms that a single overwrite pass is sufficient to prevent data recovery on current-generation magnetic media. The multi-pass methods (3-pass, 7-pass, 35-pass Gutmann) were designed for older, lower-density drives and provide no additional security benefit on modern hardware.
What's the difference between formatting and wiping?
Formatting rebuilds the file system structure (the index that tells the OS where files are located) but does not overwrite the actual data on the drive. A quick format takes seconds; a wipe takes hours. After a format, data can be recovered with free software. After a proper wipe, it cannot. Always wipe — never just format — when disposing of a drive.
Can I wipe a hard drive from BIOS?
No. BIOS/UEFI firmware does not include drive-wiping capabilities on most consumer systems. Some enterprise systems and a few manufacturer-specific BIOS implementations include Secure Erase options, but the standard approach is to boot from a USB tool like DBAN or ShredOS. Some SSD manufacturers include a Secure Erase option in their UEFI-based toolkits.
How do I wipe an SSD properly?
Do not use traditional overwrite tools like DBAN on SSDs. Instead, use the drive's firmware-level Secure Erase or Sanitize command. You can access this through manufacturer tools (Samsung Magician, WD Dashboard, etc.), a bootable tool like Parted Magic, or Linux utilities like hdparm (SATA) or nvme-cli (NVMe). See our SSD secure erase guide for step-by-step instructions.
Do I need to wipe a hard drive before recycling?
Absolutely. Electronics recyclers do not typically wipe drives before resale or material recovery. Drives removed during recycling may end up on secondary markets, in the hands of data recovery hobbyists, or in countries with limited data protection laws. Always wipe before recycling. See our recycling wipe guide.
Is DBAN still safe to use in 2026?
DBAN is safe and effective for wiping traditional HDDs. Its last official release was in 2015, but the core functionality — writing patterns to every addressable sector on a magnetic disk — hasn't changed. However, DBAN does not support SSDs, UEFI-only systems (without legacy boot), or GPT disks larger than 2 TB in some configurations. For modern hardware, ShredOS (which uses the actively maintained nwipe) is generally a better choice.
What's the best free way to wipe a hard drive?
For HDDs: ShredOS (bootable USB) or your operating system's built-in tools (DiskPart on Windows, Disk Utility on Mac, shred on Linux). For SSDs: your drive manufacturer's free tool (Samsung Magician, WD Dashboard, etc.) provides firmware-level Secure Erase at no cost. The limitation of free tools is that they typically don't provide certificates of erasure for compliance purposes.
The Bottom Line
Wiping a hard drive correctly comes down to matching the right method to your drive type. Use a single-pass overwrite tool for HDDs, and firmware-level Secure Erase or Sanitize commands for SSDs. Free tools handle most personal use cases. If you need certified proof of erasure, BitRaser Drive Eraser covers both drive types with audit-ready documentation. Use our drive wipe time calculator to estimate how long your wipe will take, or check the glossary if you encounter unfamiliar terms. Start with our best data erasure software roundup to pick the right tool.
Last updated: February 2026. We regularly review and update our guides to ensure accuracy.
Sources:
- NIST Special Publication 800-88 Rev. 2, Guidelines for Media Sanitization (September 2025). https://csrc.nist.gov/publications/detail/sp/800-88/rev-2/final
- IEEE 2883-2022, Standard for Sanitizing Storage. https://standards.ieee.org/ieee/2883/10562/
- Blancco Technology Group, "Privacy for Sale: Data Security Risks in the Second-Hand IT Asset Marketplace" (2023). https://www.blancco.com/resources/privacy-for-sale/
- NIST Computer Security Resource Center, Media Sanitization Resources. https://csrc.nist.gov/projects/media-sanitization
- Defense Counterintelligence and Security Agency (DCSA), Media Sanitization Guidance. https://www.dcsa.mil/